 By Hina
There is a unique thrill in taking a plain, unfinished object and turning it into a custom piece of art. Rolling up your sleeves for a new DIY craft project brings a wonderful sense of accomplishment. If you want a fun, rewarding activity that yields beautiful home accessories, working on a painting box project offers the perfect creative outlet.
Wooden boxes provide ultimate versatility. You can find them waiting for a makeover at local craft stores, thrift shops, or even tucked away in your garage. With a little imagination and some colorful paint, these simple storage containers transform into personalized decor, customized jewelry holders, or heartfelt handmade gifts.
Whether you are an experienced artist or a complete beginner looking for a weekend craft, painting wooden boxes opens up endless design possibilities. Let us explore some fantastic wooden box painting ideas to help you create something truly special for your home.
Why Transform a Simple Wooden Box?
Before we dive into the specific designs, let us talk about the value of upcycling and crafting your own decor. Buying brand-new storage accessories can get expensive. However, adding a personal touch to a basic wooden box allows you to match your exact home aesthetic on a budget.
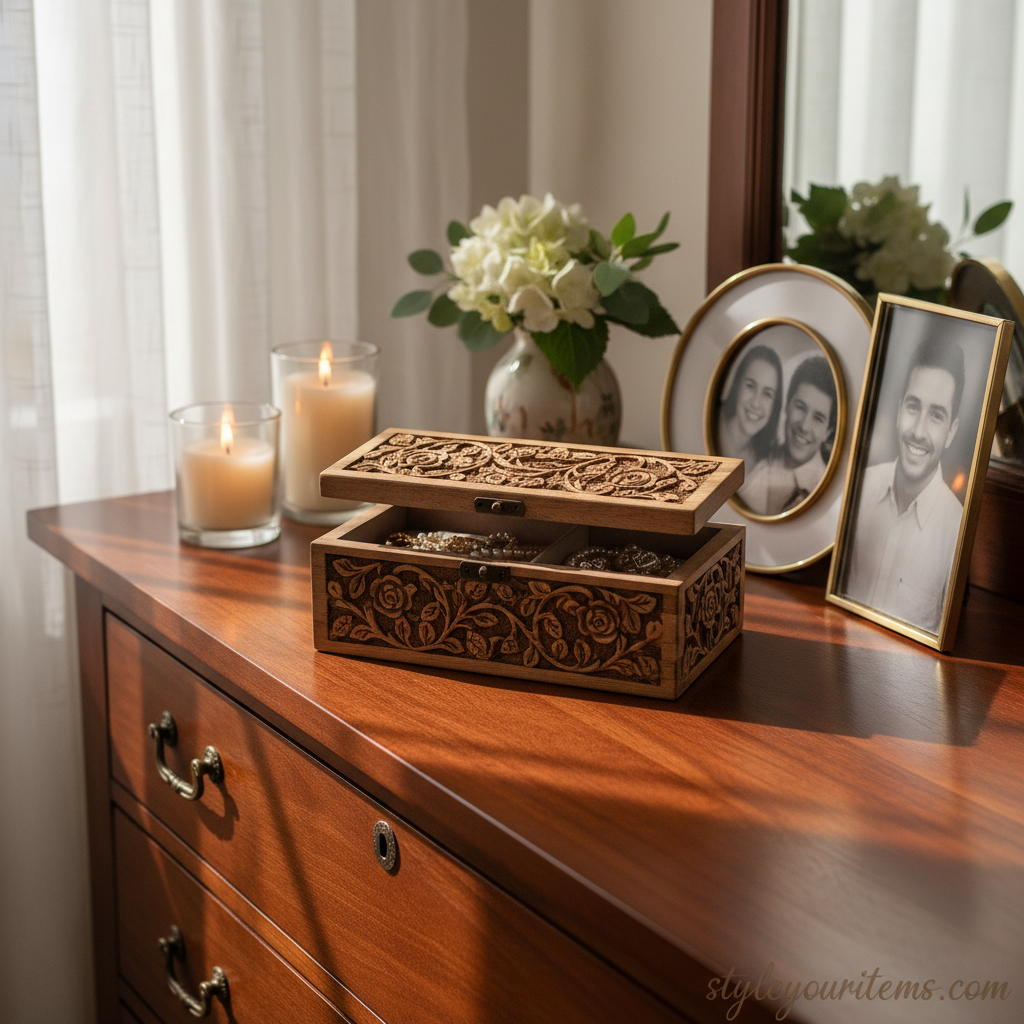
If you love exploring Crafts, you already know the joy of making something from scratch. Painted boxes serve multiple purposes across your entire house. You can use them to store remote controls in the living room, organize spices in the kitchen, or hold precious keepsakes on your nightstand. They bridge the gap between practical storage and beautiful design.
Top Wooden Box Painting Ideas
Staring at a blank wooden surface sometimes feels a little intimidating. If you are not quite sure where to begin, we have gathered several popular and stunning design concepts. These ideas will get your creative juices flowing and help you plan your next masterpiece.
1. Fabulous Floral Designs
Floral designs remain a timeless favorite for craft projects. They add a delicate, natural touch to any room. You can paint a single, elegant rose on the lid or cover the entire box in a lively meadow of bright wildflowers.
To start, sketch your flowers lightly with a pencil. Use soft acrylic paints to block in the base colors of your petals. Once dry, you can layer lighter and darker shades to add lovely visual depth. If you feel unsure about freehand painting, you can always use floral stencils. Simply secure the stencil with painter's tape, dab your paint with a soft sponge, and reveal a perfect blossom.
A floral-themed painting box makes a beautiful keepsake container. It looks especially charming when paired with our Cheap Bedroom Decor Ideas That Look Luxurious.
2. Bold Geometric Patterns
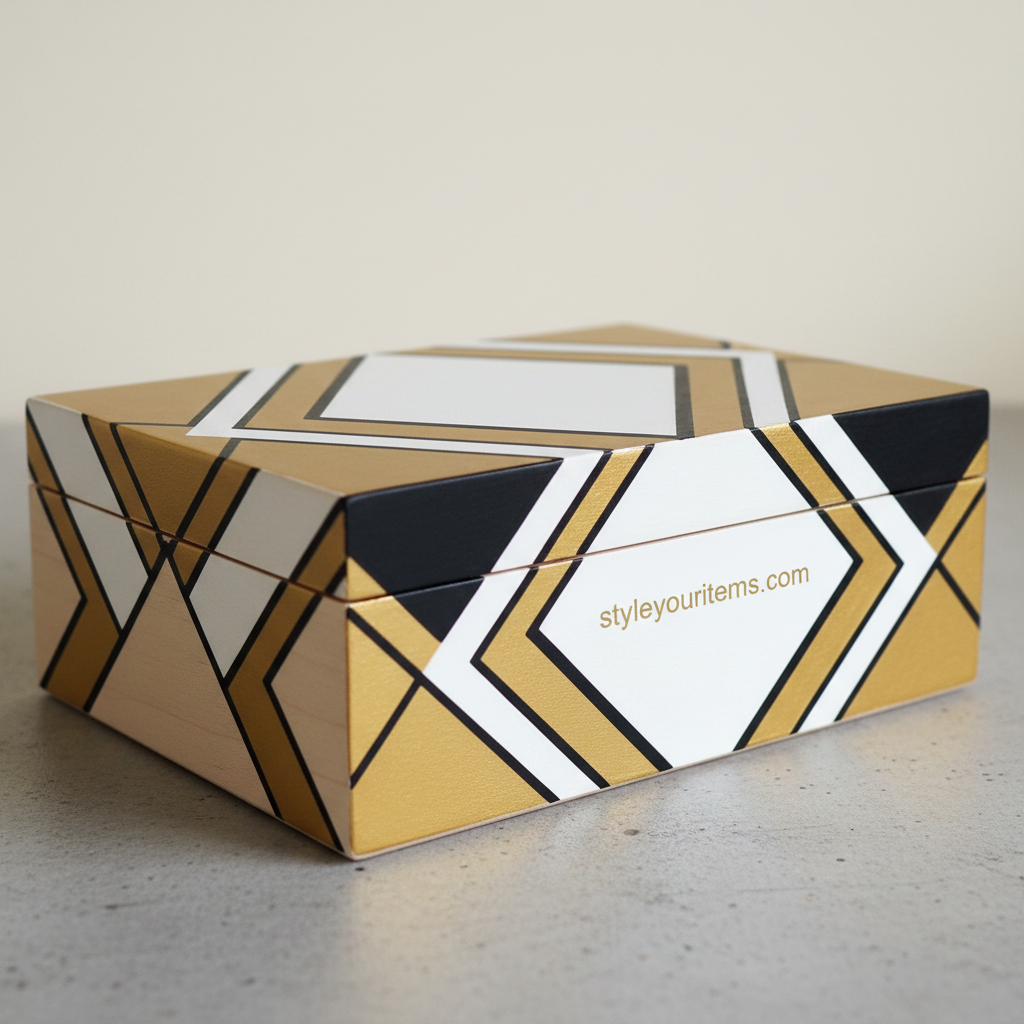
If you prefer a modern, clean aesthetic, geometric patterns will suit your style perfectly. This approach relies heavily on straight lines, contrasting colors, and striking shapes. You do not need a steady hand to pull this off, either. Quality painter’s tape serves as your best tool for this technique.
Apply strips of tape across your wooden box to create triangles, diamonds, or abstract shapes. Paint each exposed section with a different vibrant color. Peel the tape away before the paint fully dries to reveal crisp, clean lines. Metallic accents like gold or copper work exceptionally well with geometric designs. They give your box an expensive, contemporary feel that fits right in with modern Living Room Decor Ideas.
3. Mesmerizing Marbling Techniques
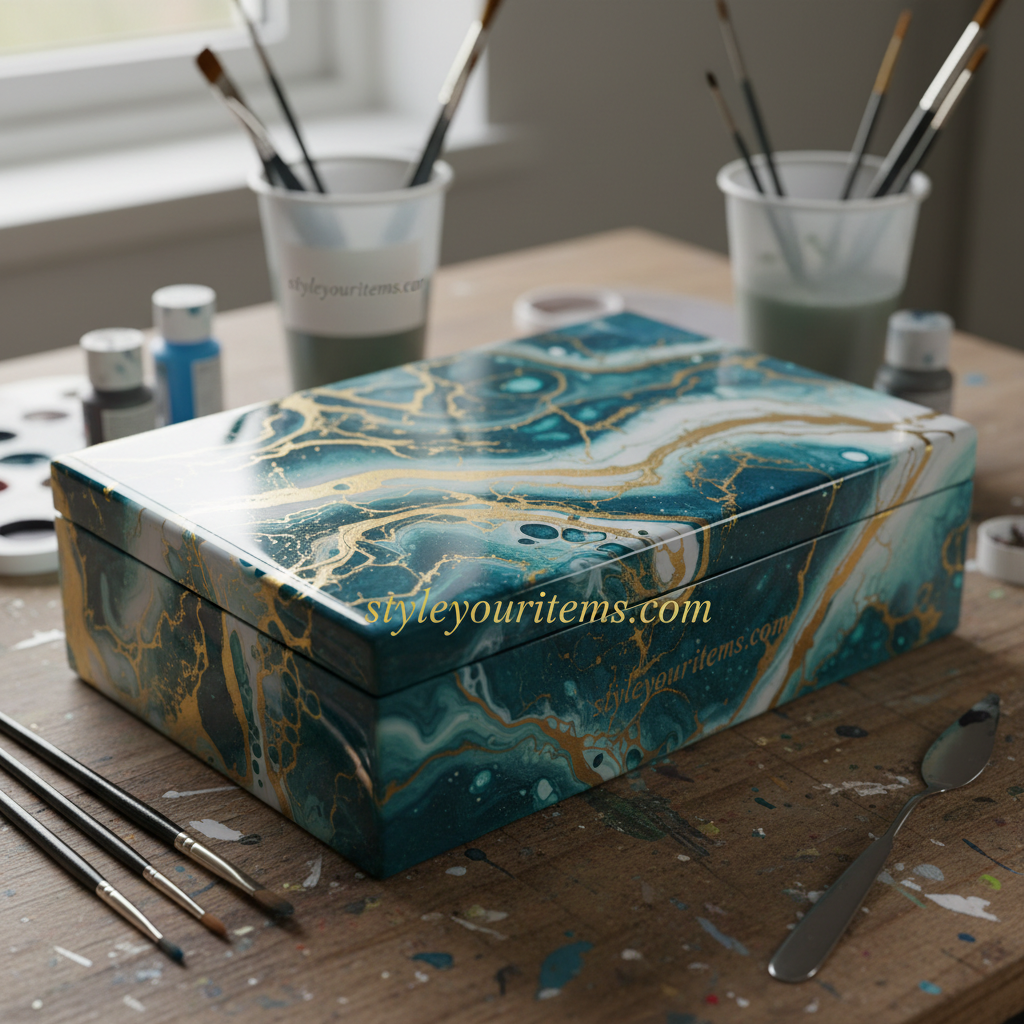
Marbling gives wood a luxurious, stone-like appearance. While it looks incredibly complex, you can achieve this effect with a few simple tricks.
One popular method involves paint pouring. Mix your acrylic paints with a liquid pouring medium in a cup. You can layer colors like turquoise, crisp white, and gold. Then, slowly pour the mixture over the lid of your box. Tilt the box gently to let the paint swirl and slide across the surface naturally.
Another excellent option is hydro-dipping. Fill a small plastic bucket with room-temperature water. Spray different colors of spray paint directly onto the water's surface. Gently dip your box into the floating design. The result is a unique, unrepeatable masterpiece every single time. These marbled boxes look spectacular sitting next to your Kitchen Shelf Décor.
4. Gorgeous Galaxy Themes
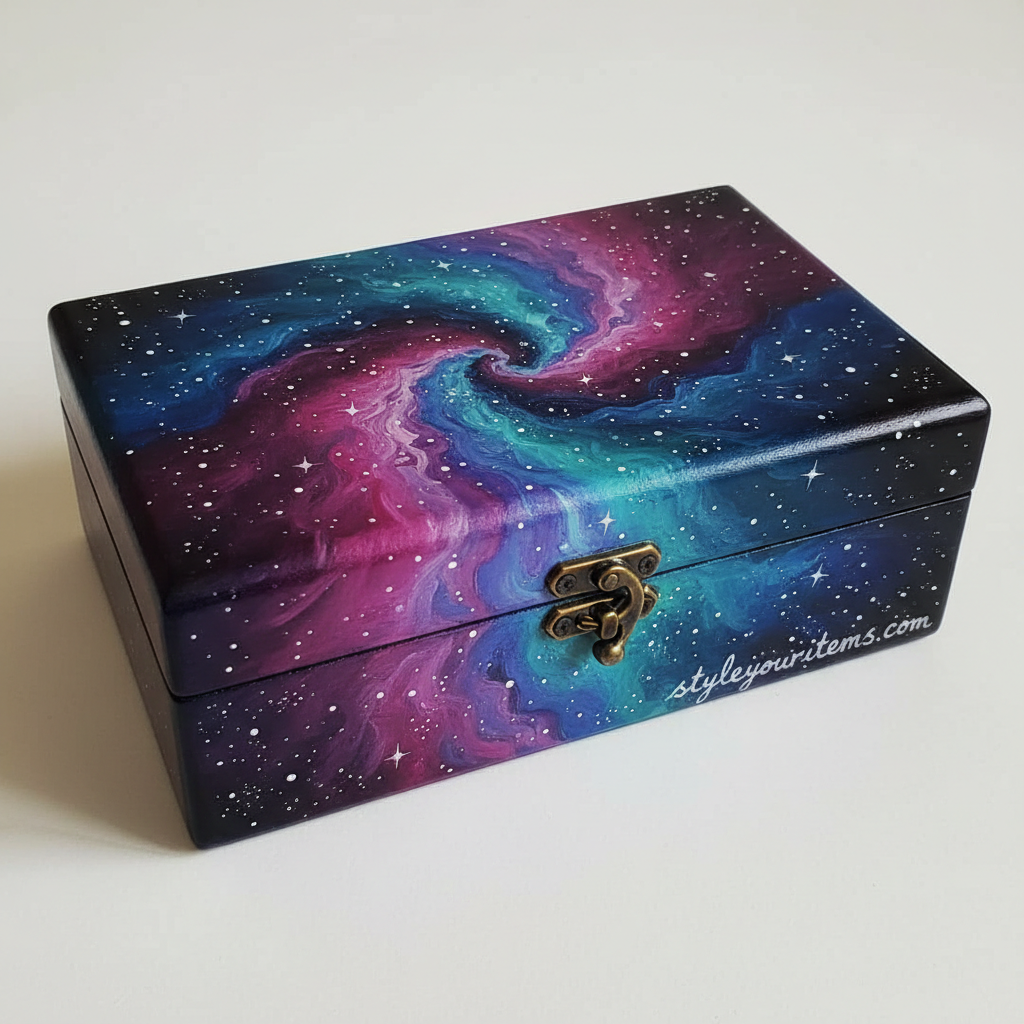
Bring the breathtaking beauty of the cosmos right to your craft table with a galaxy-themed design. This stands out as one of the most forgiving and enjoyable wooden box painting ideas. The universe is naturally chaotic and beautifully blended, meaning you cannot make a mistake.
Start by painting the entire box a deep, dark black or navy blue. While the base coat remains slightly wet, use a sponge to dab patches of magenta, bright purple, and teal around the surface. Blend the edges where the colors meet to create soft, cloudy nebulas.
For the final touch, dip an old toothbrush into slightly watered-down white paint. Run your thumb across the bristles to flick tiny specks of white across the box. These bright splatters look exactly like glowing distant stars.
Upcycling Old Boxes: A Budget-Friendly Craft
You do not always need to buy a brand-new box for this project. In fact, rescuing an old, scratched, or outdated box from a thrift store is a fantastic way to practice sustainability.
Much like giving a fresh life to larger items—a topic we cover extensively in our Old Furniture Makeover Ideas guide—upcycling small boxes brings immense satisfaction. You simply need to strip away the old finish, apply a fresh coat of primer, and let your imagination run wild. We highly recommend checking out our Upcycling category for more inspiration on transforming old items into stunning new decor.
Essential Tips for Beginners
Diving into a new crafting hobby requires a bit of practical knowledge. If this marks your first time painting wood, follow these simple preparation and painting steps. They will ensure your project turns out beautifully and lasts for years.
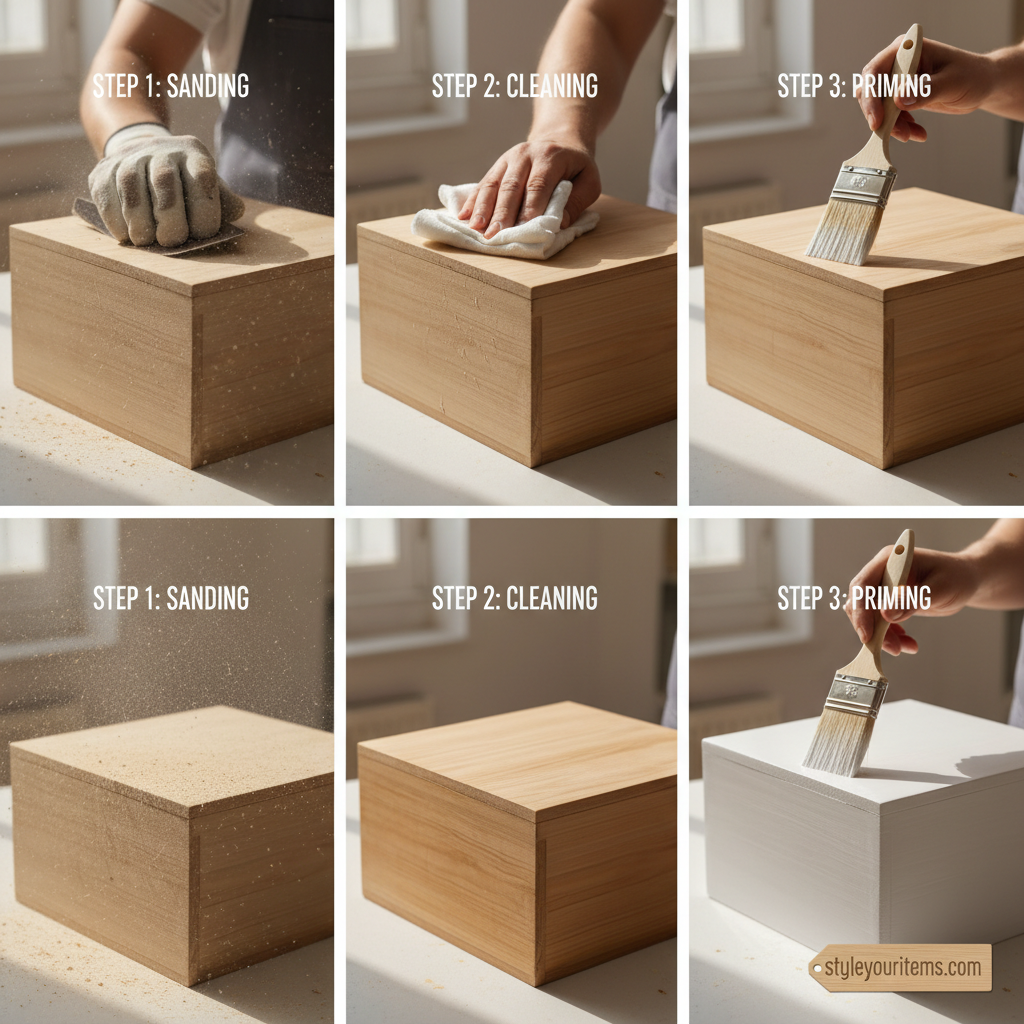
1. Prep Your Wooden Box
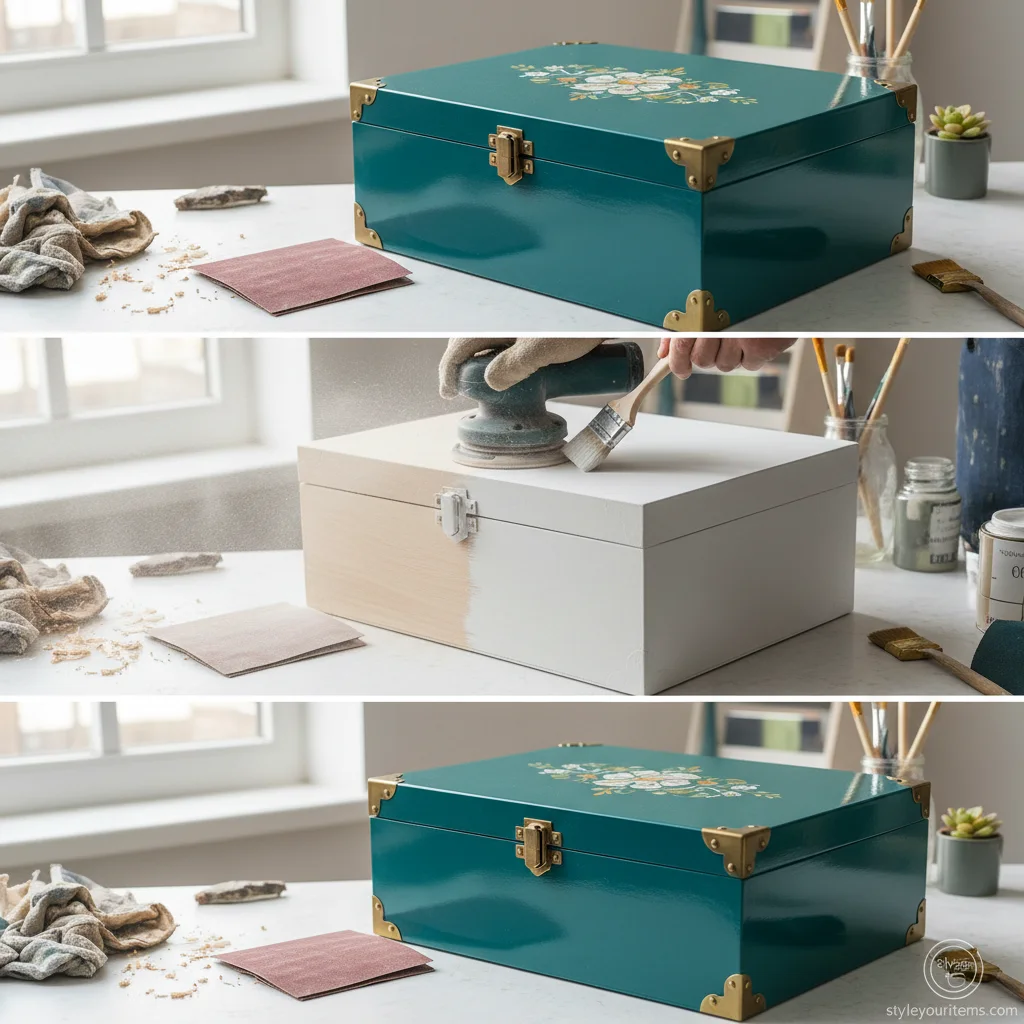
Thorough preparation makes a massive difference in your final result. Unfinished wood is highly porous and often feels rough. Start by lightly sanding the entire surface of your box with medium-grit sandpaper. Follow this up with fine-grit sandpaper until the wood feels completely smooth to the touch. Wipe away all the leftover dust with a slightly damp microfiber cloth.
Next, apply an even coat of wood primer. Primer seals the porous surface, meaning the wood will not soak up all your expensive craft paint. It also provides a smooth base that helps your colors appear much brighter.
2. Choose the Right Paint
When exploring different wooden box painting ideas, acrylic paint usually serves as your best choice. Acrylics dry very quickly, clean up easily with warm water, and come in a massive variety of vibrant colors.
Chalk paint serves as another excellent option if you want a matte, vintage, or distressed look. It requires less prep work and adheres beautifully to almost any surface. Avoid using watercolors, as they will simply bleed into the wood grain unless you heavily prime the surface first.
3. Seal and Protect Your Work
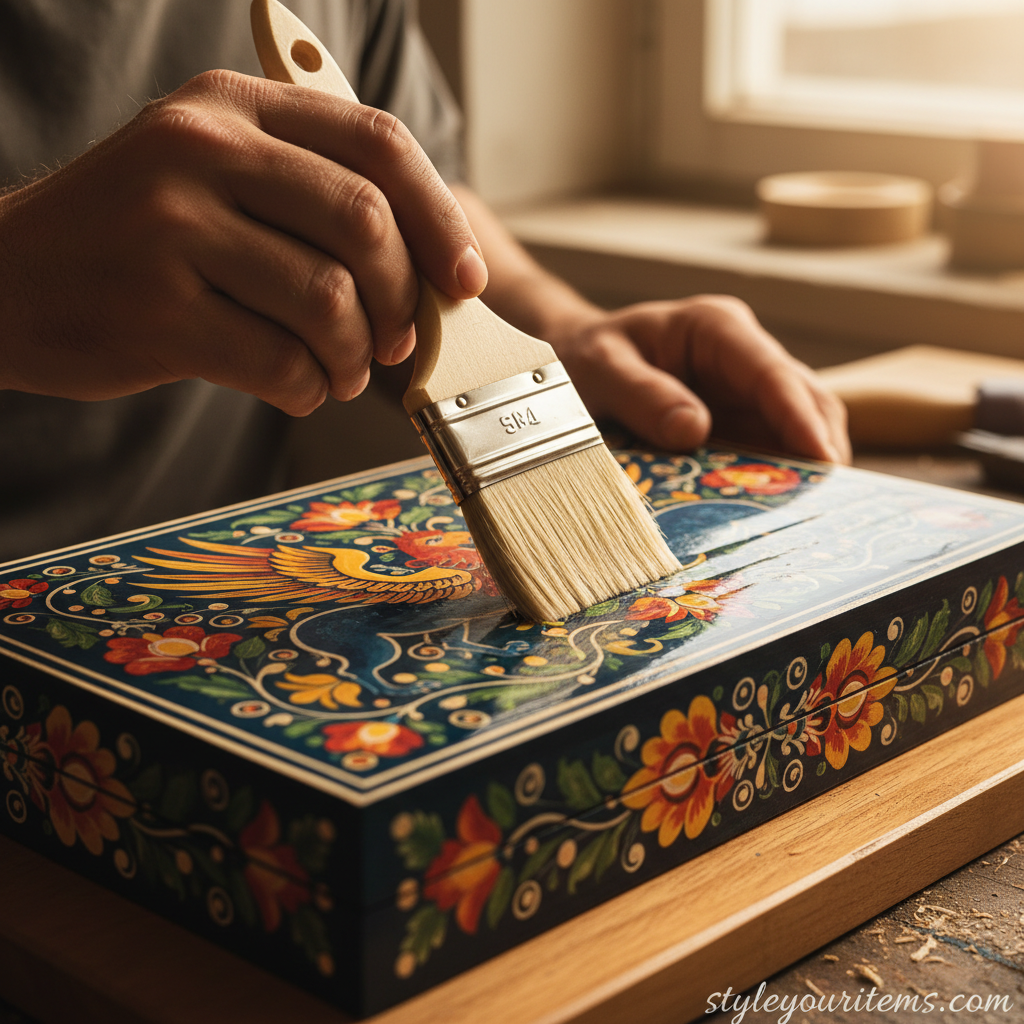
After you spend hours perfecting your custom design, you must protect it from scratches, household dust, and moisture. Once your paint dries completely—waiting at least 24 hours is usually best—apply a clear protective sealant.
You can choose a glossy varnish for a shiny finish or a matte polycrylic for a subtle, natural look. Apply the sealant in thin, even coats using a soft-bristled brush. Let each coat dry fully before adding the next one. Two or three coats will ensure your beautiful box handles daily use without chipping or peeling.
How to Style Your Painted Boxes
Once your painting box project is complete and fully dry, the fun of styling begins. These custom pieces fit seamlessly into almost any room in your house.
Place a geometrically painted box on your entryway console table to catch keys and loose change. Set a beautiful floral box on your dresser to organize earrings and rings. If you created a rustic, chalk-painted box, it will look right at home alongside your Bedroom Decor. The beauty of DIY decor is that you get to decide exactly how and where it shines.
Time to Start Painting
Creating your own personalized wooden box is an amazing way to spend a quiet afternoon. It allows you to express your unique creativity, learn fun new techniques, and produce a beautiful, functional item for your home.
Whether you decide to craft a lovely floral jewelry box, a modern geometric storage container, or a cosmic galaxy gift box, the creative process remains entirely yours. There are no strict rules in art. Give yourself permission to experiment with colors, make little mistakes, and genuinely have fun.
Grab your paintbrushes, pick out a plain wooden box, and bring your favorite wooden box painting ideas to life today. If you enjoyed this guide, take a moment to explore our other creative projects. Browse through our extensive Crafts section for more budget-friendly decor ideas, and let Style Your Items help you make your house feel like a beautifully styled home.
Frequently Asked Questions About Wooden Box Painting
What kind of paint works best for wooden box painting?
Acrylic paint is the most popular choice because it's quick-drying, vibrant, and easy to work with. Chalk paint is also a great option if you want a matte or vintage look. For best results, avoid watercolor paint unless the wood is heavily primed.
Do I need to prime my wooden box before painting?
Yes! Priming your box with a wood primer helps seal the surface, prevents paint from soaking in, and makes your paint colors stand out. Priming also helps your finished project last longer.
How do I prepare a wooden box for painting?
Start by sanding the entire surface with medium- and then fine-grit sandpaper to smooth out any rough patches. Wipe away dust with a damp cloth, then apply a coat of wood primer. Once dry, your box is ready for paint.
Can I use spray paint on a wooden box?
You can use spray paint for a smooth, even finish or to achieve special effects like marbling (try hydro-dipping!). Make sure to spray in a well-ventilated area and use light, even coats for the best results.
How do I seal and protect my painted wooden box?
Use a clear, water-based varnish or polycrylic sealant once your paint is completely dry. Apply 2-3 thin coats with a soft brush, letting each coat dry thoroughly. This will protect your design from scratches, dust, and moisture.
Is it possible to upcycle or reuse old boxes for painting?
Absolutely! Upcycling old or thrifted boxes is a sustainable way to create beautiful decor. Give them a good sanding, prime the surface, and transform them into a new work of art. See our Upcycling section for more sustainable craft ideas.
Where can I find more DIY decor inspiration?
You can find plenty of creative projects and ideas in our Crafts and Bedroom Decor categories. We regularly share upcycling tips, painting inspiration, and home styling guides to help spark your creativity!
If you have more questions about painting box projects or wooden box painting ideas, leave a comment below or explore our website for more hands-on guides and creative inspiration. Happy crafting!